


 Google Safe
 Live Chat
 0
0
PoE 2 Map Tier List 2025 - Best Endgame Maps in Path of Exile 2
In Path of Exile 2, a map refers to an endgame area where players engage in challenging content to farm experience, currency, and rare items. If you want to know the best map to run, read our PoE 2 map tier list 2025, we have ranked the best maps for endgame.
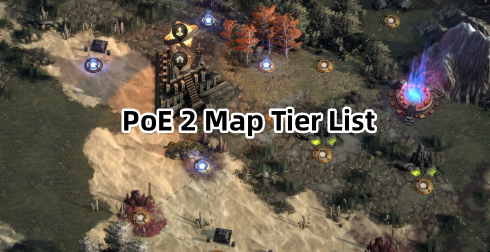
PoE 2 Best Map 2025 - Path of Exile 2 Maps Tier List
The Path of Exile 2 Endgame Map Tier List is based on several key criteria that affect both efficiency and profitability. Focus on S-Tier best Path of Exile 2 maps for the best farming efficiency, whether you’re grinding for currency, experience, or rare drops. Use A-Tier Maps when you need variety or specific farming goals, as they’re still highly rewarding. Consider B-Tier Maps if you’re optimizing for specific loot or filling out your Atlas progression. Avoid C-Tier Maps on this PoE 2 endgame map tier list unless they’re necessary for map completion or niche strategies.
Path of Exile 2 Map Tier List
S Tier
Burial Bog – Compact layout with high mob density and straightforward navigation make this map ideal for fast, efficient farming.
Creek – Linear design with consistent mob packs and minimal obstacles ensures smooth and fast clearing.
Rustbowl – High-density mobs packed into a relatively small area, making it great for sustained XP gains.
Sandspit – Open layout with excellent visibility and mob clusters, offering efficient farming.
Savannah – Compact design, high density, and rewarding bosses make this a strong farming map.
Steaming Springs – Balanced layout of open spaces and corridors with consistent mob density and good loot potential.
Steppe – Open yet efficient layout with mob clusters that favor AoE builds, offering fast clears.
Wetlands – Dense mobs in easily navigable areas, perfect for both loot and experience farming.
Willow – Predictable mob spawns in a compact area with rewarding bosses make this best map in Path of Exile 2.
A Tier
Backwash – Offers decent mob density and a manageable layout with minimal backtracking.
Bloodwood – Dense mobs in a medium-sized map with good farming potential for loot.
Blooming Field – Simple layout with consistent mob density, great for steady farming.
Cenotes – A mix of open and tight areas with good mob clustering, making it versatile for different builds.
Crimson Shores – Strong AoE opportunities in a straightforward layout with decent loot potential.
Decay – High-density mobs in a compact space, though slightly less efficient than S-tier maps.
Fortress – Balanced map with good density and manageable navigation.
Hidden Grotto – Tight corridors with consistent mobs, great for AoE builds.
Hive – High mob density with a straightforward layout, though slightly slower to clear.
Oasis – Open, navigable layout with steady mob density, good for ranged builds.
Ravine – Simple linear map with consistent mob clustering and minimal downtime.
Riverside – Linear design with solid mob density and decent loot potential.
Slick – Compact map with packed mobs, though navigation can be tricky at times.
Spider Woods – Great mob density with clear paths, ideal for AoE and fast clears.
Sulphuric Caverns – Balanced layout with decent mob density, rewarding for loot-focused farming.
Sump – Decent mob density and a unique layout, though slightly less efficient than S-tier maps.
B Tier
Abyss – Average density in a straightforward layout, but less rewarding than higher tiers.
Augury – Compact and easy to clear, but mob density and loot potential are mediocre.
Crypt – Small map with predictable mobs, though slightly slower for farming.
Deserted – Balanced layout with average mob density, decent for casual farming.
Gothic City – Decent density but lacks efficient navigation, slowing clears.
Necropolis – Good mob clusters but hindered by a cumbersome layout.
Penitentiary – Tight map with consistent mobs, but loot potential is average.
Seepage – Compact and navigable, though mob density is not ideal for fast farming.
Woodland – Decent density in a straightforward map, but lacks standout mechanics.
C Tier
Channel – Long, linear layout but sparse mobs and low loot potential make it inefficient.
Forge – Dense mobs but overly cluttered layout slows farming speed.
Lofty Summit – Unpredictable mob placements and poor navigation make this map subpar.
Mineshaft – Tight corridors with sparse mobs, slowing clear times significantly.
Mire – Open map with low visibility and sparse mobs, making it inefficient.
Sun Temple – Poor layout with mobs spread too thinly for efficient farming.
Vaal City – Overly complex layout with low density, making it one of the least efficient maps.
Vaal Factory – Similar to Vaal City, with a cluttered layout and suboptimal mob placement.
Vaal Foundry – Poor navigation and low mob density put this map firmly in the bottom tier.
How to get Maps in Path of Exile 2?
In Path of Exile 2, maps can be obtained through several methods. Enemy drops are the most common source, as monsters, bosses, and chests in the endgame can drop maps, with tougher enemies providing higher-tier maps. Vendor recipes allow you to trade three maps of the same type and tier for one of the next tier, helping you progress when stuck. The Map Device can grant access to unique maps and special encounters, and using Sacrifice Fragments can enhance map drops. If you need specific maps quickly, you can do Path of Exile 2 trade with other players using PoE currency, making platforms like SSEGold a convenient option to build your collection efficiently.
How to Reset Maps in Path of Exile 2?
Approach the Entry Point: Go to the entry point or transition point of the area you want to reset. This is typically where the name of the adjacent zone is displayed.
Resetting on PC: If you're playing on PC, hold down Ctrl and left-click the entrance. This will bring up a menu with your saved instances. Click the "New" button to reset the instance.
Resetting on Consoles: For PlayStation, press Triangle to access the instance menu, and for Xbox, press Y.
Automatic Reset: Note that instances will automatically reset and portals will close if left alone for 8-15 minutes, according to in-game hints.
- PoE 2 Divine Orb Farm 2025 - Best Ways To Get Divine Orbs in Path of Exile 2
- Path of Exile 2 Full Release Date, League Schedule, Character Transfer, Server and More
- PoE 2 Tier List 2025 - Easiest Class & Best Budget Builds in Path of Exile 2
- PoE 2 New Season, Classes & Patch 0.2.0 Release Date | Path of Exile 2 Updates 2025
- PoE 1 Legacy of Phrecia Best New Ascendancy & Build Tier List (3.25)
- PoE 1 3.26 League Release Date, PoE 2 New Patch, Updates and Issues
